

有一个能支持 Let’s Encrypt 的 DNS 服务,决定暂时舍弃 GeoDNS 功能,使用一套更加成熟的解决方案提供服务。
搭配方案如下:
- PowerDNS
- MySQL
- PowerDNS-Admin
- NGINX, Let’s Encrypt
- Supervisor, VirtualEnv, Gunicorn, …
服务器部署:
- 管理服务器 x1
- MySQL Master
- PowerDNS
- PowerDNS-Admin, supervisor, virtualenv, gunicorn…
- NGINX, Let’s Encrypt
- DNS 服务器 x4
- MySQL Slave
- PowerDNS
在管理服务器上安装 PowerDNS 和 MySQL Master 的考量是由于 PowerDNS-Admin 使用 PowerDNS HTTP API,在管理服务器(或管理私网中)启动一个仅用于提供 API 和操作主数据库的 PowerDNS 实例能够减轻 Primary NS Server 的压力并提升安全性。整套架构使用 Ansible 进行自动化部署,不过好久没用了各种生疏,照着文档折腾好久的配置…
于是这里暂且记录下整个过程。有些坑只是作者一时疏忽或者有别的考量但没有明确记录,也许在未来的版本中会修复。
安装 PowerDNS
所有服务器均使用 Ubuntu 16.04,需要 PowerDNS 4.0 以上的版本。按照此页面的说明添加 PowerDNS 官方的仓库即可。
|
由 dpkg 自动配置 PowerDNS 的数据库,然后删除 /etc/powerdns/pdns.d 下无关的配置文件。
# rm /etc/powerdns/pdns.d/pdns.local.conf # rm /etc/powerdns/pdns.d/pdns.simplebind.conf |
配置 MySQL Replication,管理服务器作为 Master,其他 DNS 服务器作为 Slave。细节不多讲,官方文档或者 DigitalOcean Tutorial。
管理服务器 (MySQL Master) PowerDNS 配置文件 /etc/powerdns/pdns.conf
api=yes api-key=yourapisecretkey api-logfile=/var/log/pdns-api.log config-dir=/etc/powerdns guardian=yes include-dir=/etc/powerdns/pdns.d launch= local-address=127.0.0.1 # 不对外提供服务 local-ipv6=::1 security-poll-suffix= setgid=pdns setuid=pdns webserver=yes webserver-address=127.0.0.1 # 仅向本机的 PowerDNS-Admin 调用。如果配置在内网, 请使用内网 IP webserver-allow-from=127.0.0.1/32 # 同上,如果使用内网则写 PowerDNS-Admin 在内网的 IP webserver-port=8081 default-soa-name=ns1.example.com # 改为 Primary NS 的地址 default-soa-edit=INCEPTION-INCREMENT default-soa-mail=hostmaster.example.com # 改为默认服务器管理员的邮箱地址, 并将 '@' 替换为 '.' default-ttl=3600 |
DNS 服务器 (MySQL Slaves) PowerDNS 配置文件 /etc/powerdns/pdns.conf
config-dir=/etc/powerdns daemon=yes disable-axfr=yes guardian=yes include-dir=/etc/powerdns/pdns.d launch= security-poll-suffix= server-id=ns1.example.com # 改为当前服务器的 ID,ns1/ns2/ns3/etc... setgid=pdns setuid=pdns version-string=anonymous # 可以写任意字符串恶搞_(:з」∠)_ |
安装 PowerDNS-Admin
安装依赖:
# apt install git python-pip supervisor virtualenv python-dev
libmysqlclient-dev libsasl2-dev libldap2-dev libssl-dev letsencrypt
|
创建数据库,切换到普通用户权限,clone 仓库到本地,然后一步一步操作即可。
$ git clone https://github.com/ngoduykhanh/PowerDNS-Admin.git $ cd PowerDNS-Admin $ virtualenv flask $ source ./flask/bin/activate $ pip install -r requirements.txt $ pip install mysql gunicorn $ cp config_template.py config.py $ vim config.py |
配置文件 config.py 中需要更改的地方:
SECRET_KEY = 'yoursessionencryptkey' SQLA_DB_USER = 'yourdbusername' SQLA_DB_PASSWORD = 'yourdbpassword' SQLA_DB_HOST = 'localhost' SQLA_DB_NAME = 'yourdbname' PDNS_STATS_URL = 'http://localhost:8081/' PDNS_API_KEY = 'yourapisecretkey' PDNS_VERSION = '4.0.0' RECORDS_ALLOW_EDIT = ['A', 'AAAA', 'CNAME', 'SPF', 'PTR', 'MX', 'TXT', 'SRV', 'NS', 'SOA'] |
然后执行 ./create_db.py。如果没有报错说明数据库安装成功,执行 ./run.py 即可访问 http://127.0.0.1:9393 看到登陆页面了。
部署 Web 服务
直接跑 run.py 当然不科学。Supervisor 配置文件 /etc/supervisor/conf.d/pdnsadmin.conf
[program:pdnsadmin] command=/home/pdns/PowerDNS-Admin/flask/bin/gunicorn run:app directory=/home/pdns/PowerDNS-Admin/ user=pdns autostart=true stdout_logfile=/var/log/supervisor/pdns-stdout.log stdout_logfile_maxbytes=1MB stdout_logfile_backups=2 stderr_logfile=/var/log/supervisor/pdns-stderr.log stderr_logfile_maxbytes=1MB stderr_logfile_backups=2 |
创建 DHParam
|
|
NGINX 配置文件 /etc/nginx/site-enabled/pdnsadmin.conf
server { listen 80; server_name dns.example.com; location /.well-known { default_type "text/plain"; root /var/www/html; } location / { return 301 https://dns.example.com$request_uri; } } server { listen 443 ssl; listen [::]:443 ssl; server_name dns.example.com; ssl on; ssl_certificate /etc/letsencrypt/live/dns.example.com/fullchain.pem; ssl_certificate_key /etc/letsencrypt/dns.example.com/privkey.pem; ssl_protocols TLSv1 TLSv1.1 TLSv1.2; ssl_prefer_server_ciphers on; ssl_ciphers "EECDH+ECDSA+AESGCM EECDH+aRSA+AESGCM EECDH+ECDSA+SHA384 EECDH+ECDSA+SHA256 EECDH+aRSA+SHA384 EECDH+aRSA+SHA256 EECDH+aRSA+RC4 EECDH EDH+aRSA !aNULL !eNULL !LOW !3DES !MD5 !EXP !PSK !SRP !DSS !RC4"; keepalive_timeout 70; ssl_session_cache shared:SSL:10m; ssl_session_timeout 10m; ssl_dhparam /etc/ssl/certs/dhparam.pem; add_header Strict-Transport-Security max-age=63072000; add_header X-Frame-Options SAMEORIGIN; add_header X-Content-Type-Options nosniff; access_log /var/log/nginx/dns.example.com.access.log; error_log /var/log/nginx/dns.example.com.error.log; location /.well-known { default_type "text/plain"; root /var/www/html; } location /static { alias /home/pdns/PowerDNS-Admin/app/static; } location / { proxy_pass http://127.0.0.1:8000; proxy_redirect default; proxy_set_header Host $host; proxy_set_header X-Real-IP $remote_addr; proxy_set_header X-Forwarded-For $proxy_add_x_forwarded_for; proxy_set_header X-Forward-IP $remote_addr; port_in_redirect on; server_name_in_redirect off; proxy_connect_timeout 300; } } |
记得把 dns.example.com 换成自己的域名。
签发 Let’s Encrypt。也不多讲。NGINX 配置中已经有了针对 Let’s Encrypt 的续期设置。
然后重启各项服务
|
|
查看 PowerDNS-Admin 的运行状态,使用 supervisorctl status。
添加 GLUE 记录
要使自己的 NS 生效,必须有保存在上级 NS 中的记录。很多域名注册商都提供了配置 GLUE 记录的功能,例如 Hexonet (1API):
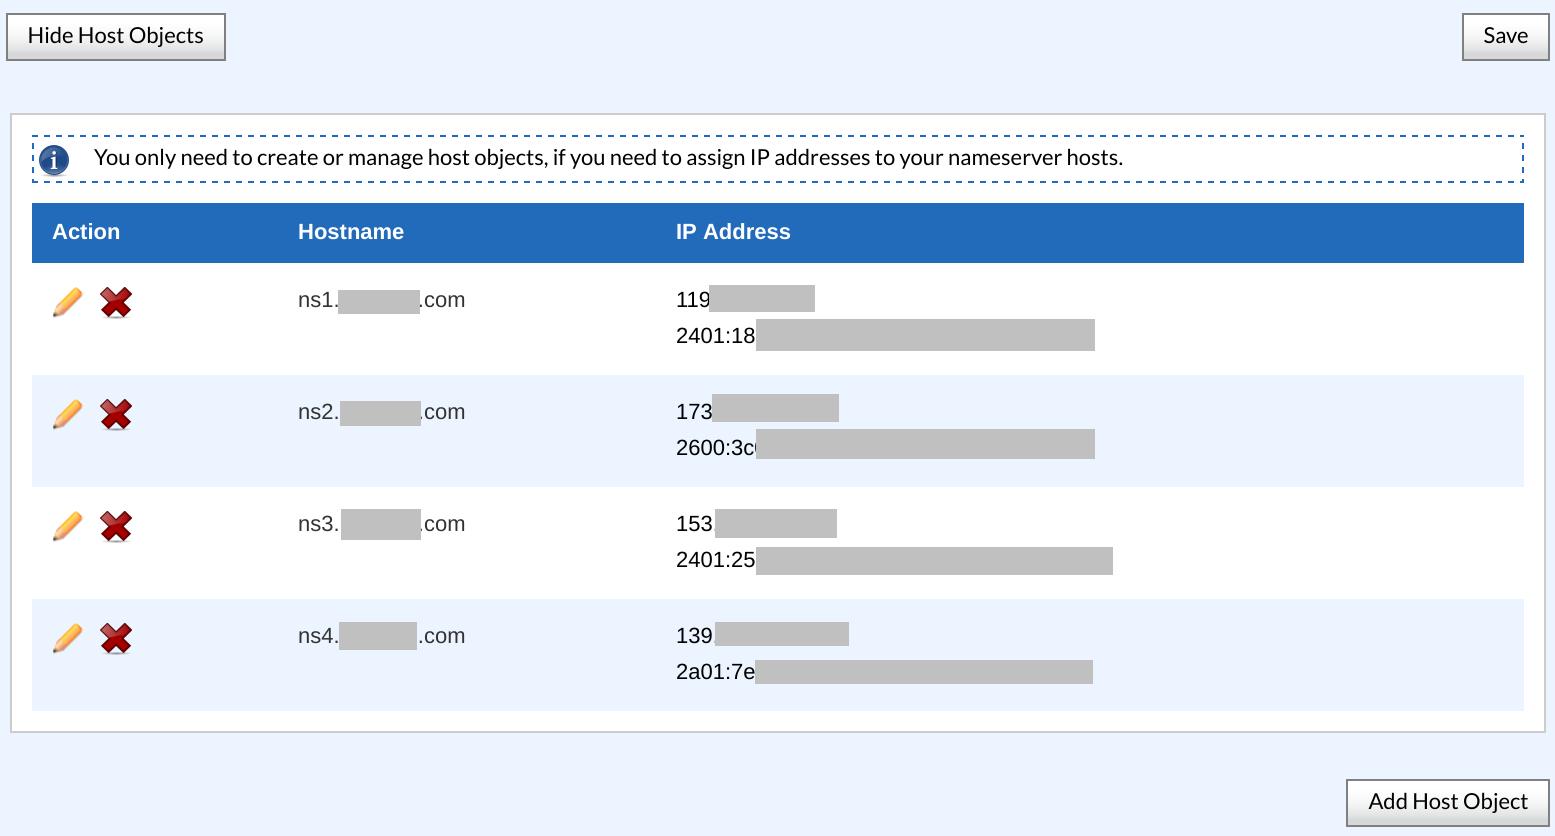
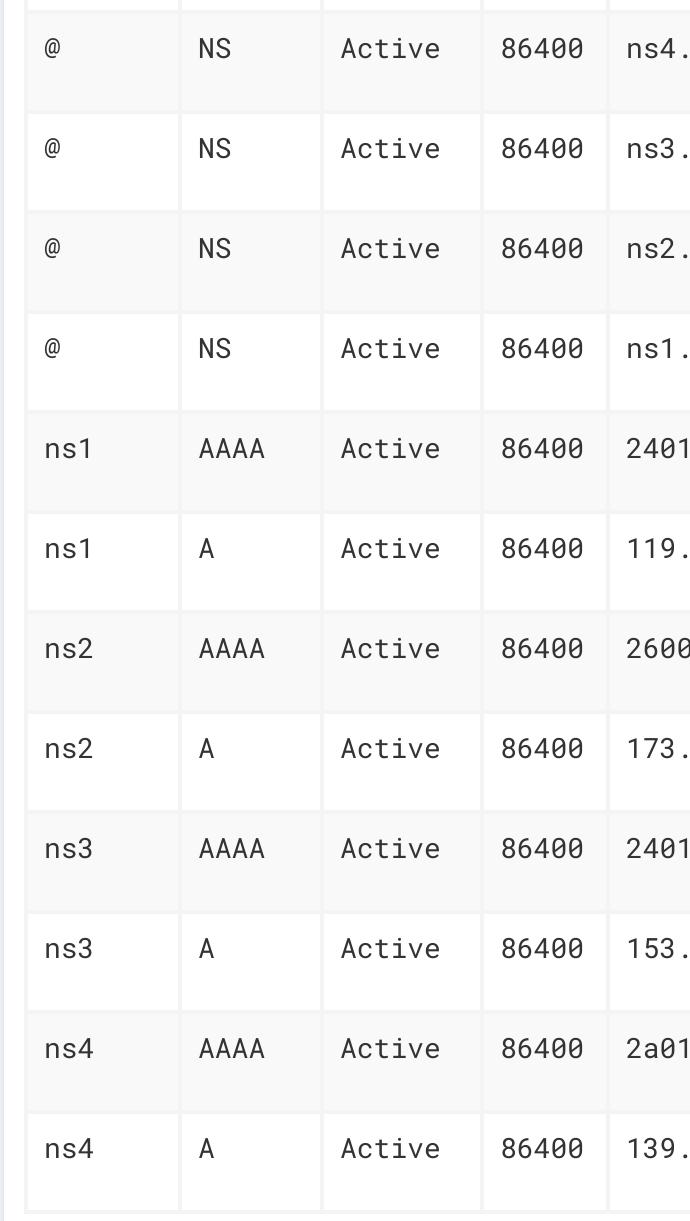
简言之,需要把自己的 NS 服务器及对应的 IP 记录到上级 NS。完成之后,通过 PowerDNS-Admin 添加自己的域名,zone 类型为 NATIVE。然后添加所有 NS 服务器的 A/AAAA 以及所有的 NS 记录——你没听错,要自己写 NS 记录。其他域名也需要添加这些 NS 记录,否则不会托管。
收尾
全部完成之后就是一个完整功能的 DNS 服务了。如果希望启用 DNSSEC,需要在管理服务器中通过 pdnsutil 来添加 key。
由于目前 PowerDNS-Admin 没有限制不能添加提供的 NS 之外的名称服务器,所以其他域名按照添加 GLUE 记录的方法,也可以将这些 NS 服务器「变成」自己的 NS。
好了,不会说话了。讲效果——
一般来说,DNS 服务都会提供多台 NS 服务器域名,将域名的 DNS 改为这些 NS 服务器才能托管到该 DNS 服务上。但是现在只需要知道这套 DNS 的服务器 IP 地址,即可给自己的域名添加 GLUE 记录、NS 记录和 NS 对应的 A/AAAA 记录进而使用自己的域名作为 NS,而不需要用 DNS 服务的 NS 域名。当然一般就是看起来会比较厉害而已…


评论 (0)